Creating Payment Links
You can create Payment Links in two ways: through the Command Center UI for manual creation, or through the API for programmatic workflows. Both methods produce the same result -- a shareable Payment Link your customer can use to pay.
Creating Payment Links via Command Center
To create a Payment Link in the Command Center, navigate to Create and select Payment Links, then click Create a Link. The creation form has three tabs: Details, Customer, and Advanced.
Payment Details
The Details tab is where you configure what the customer is paying for.

Link type -- choose between Amount (fixed amount) and Product (itemized products). With Amount, you enter a single total. With Product, you add line items with title, description, SKU ID, price, quantity, tax, and optional image. Each product requires a unique SKU ID per submerchant.
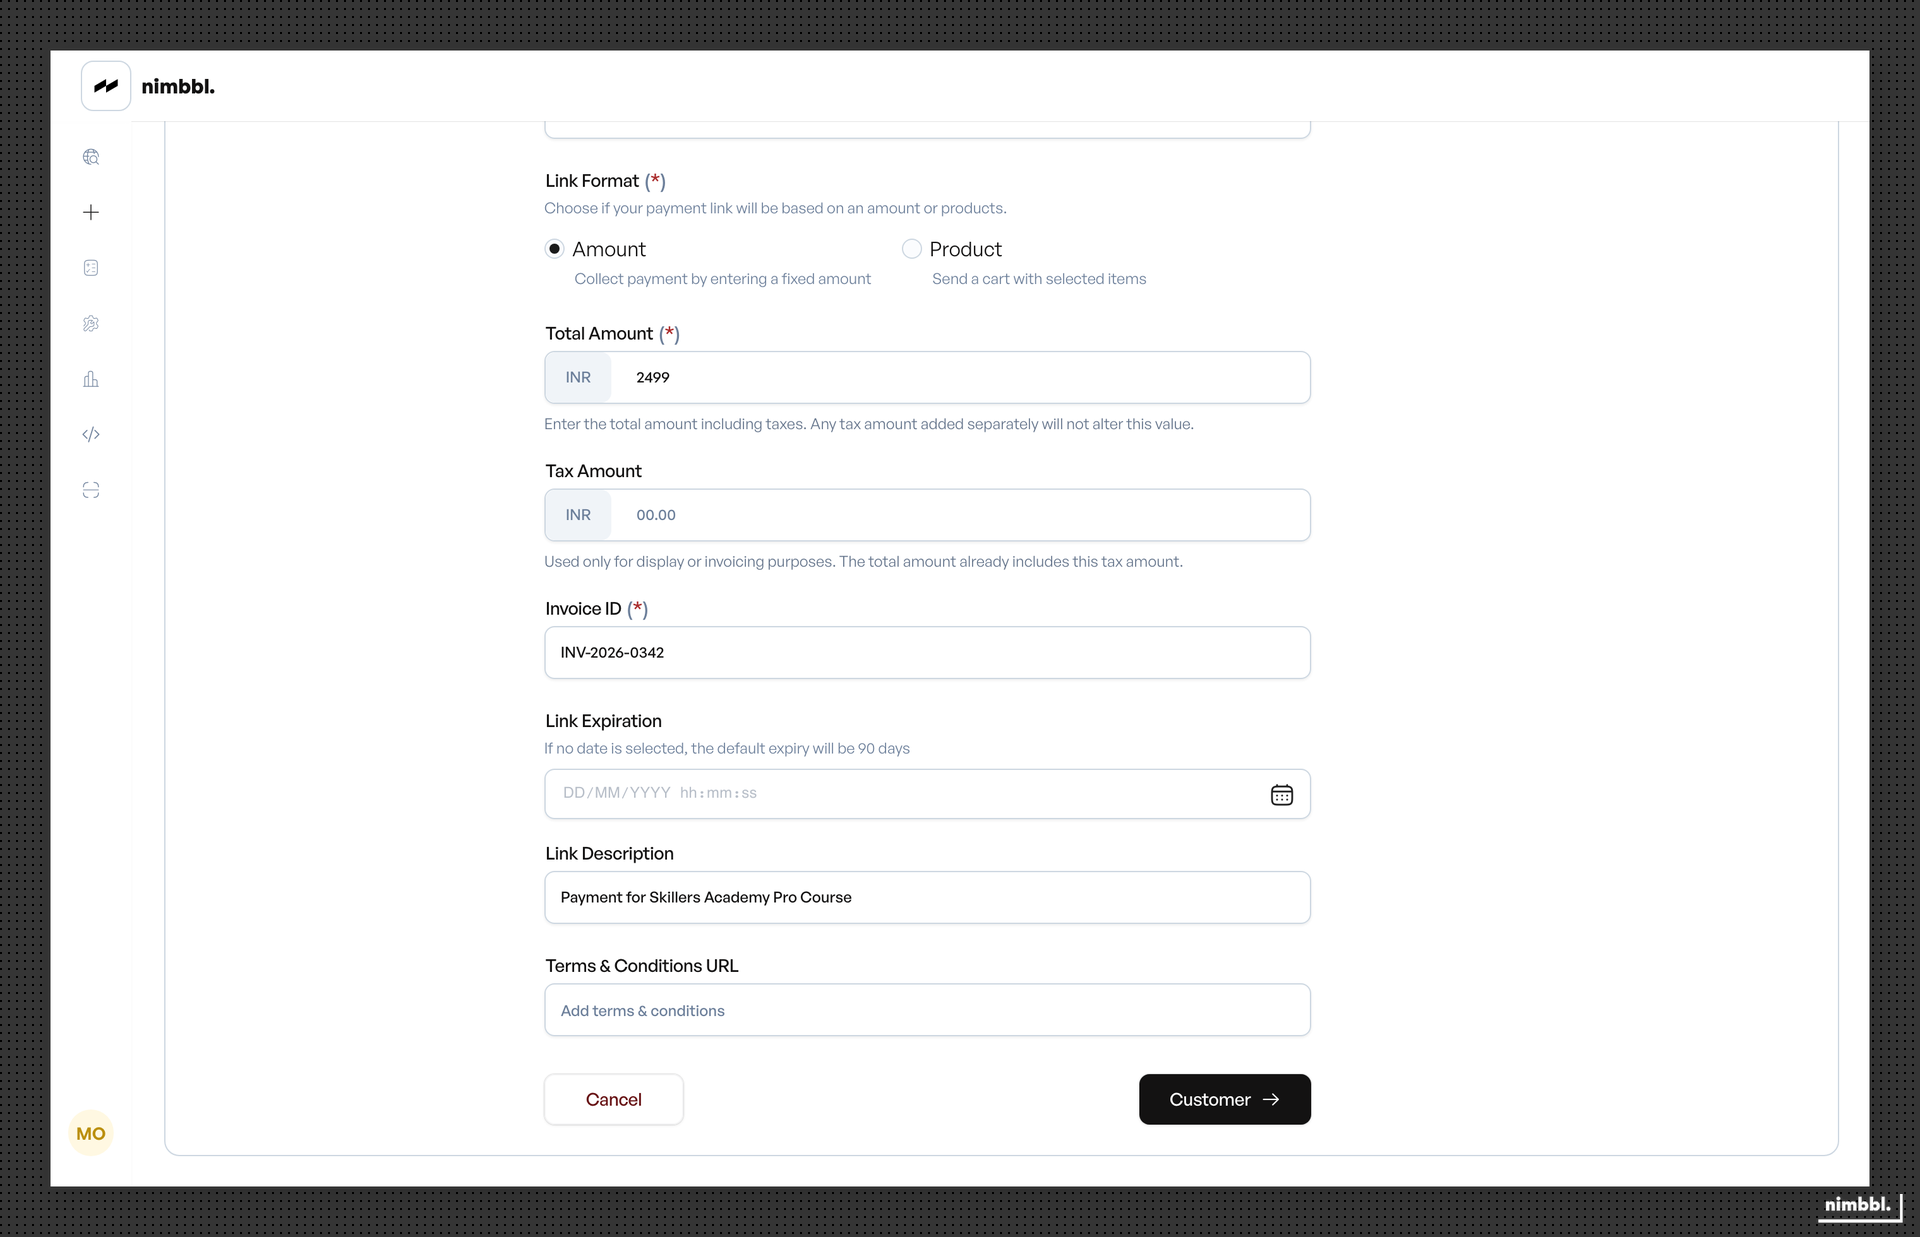
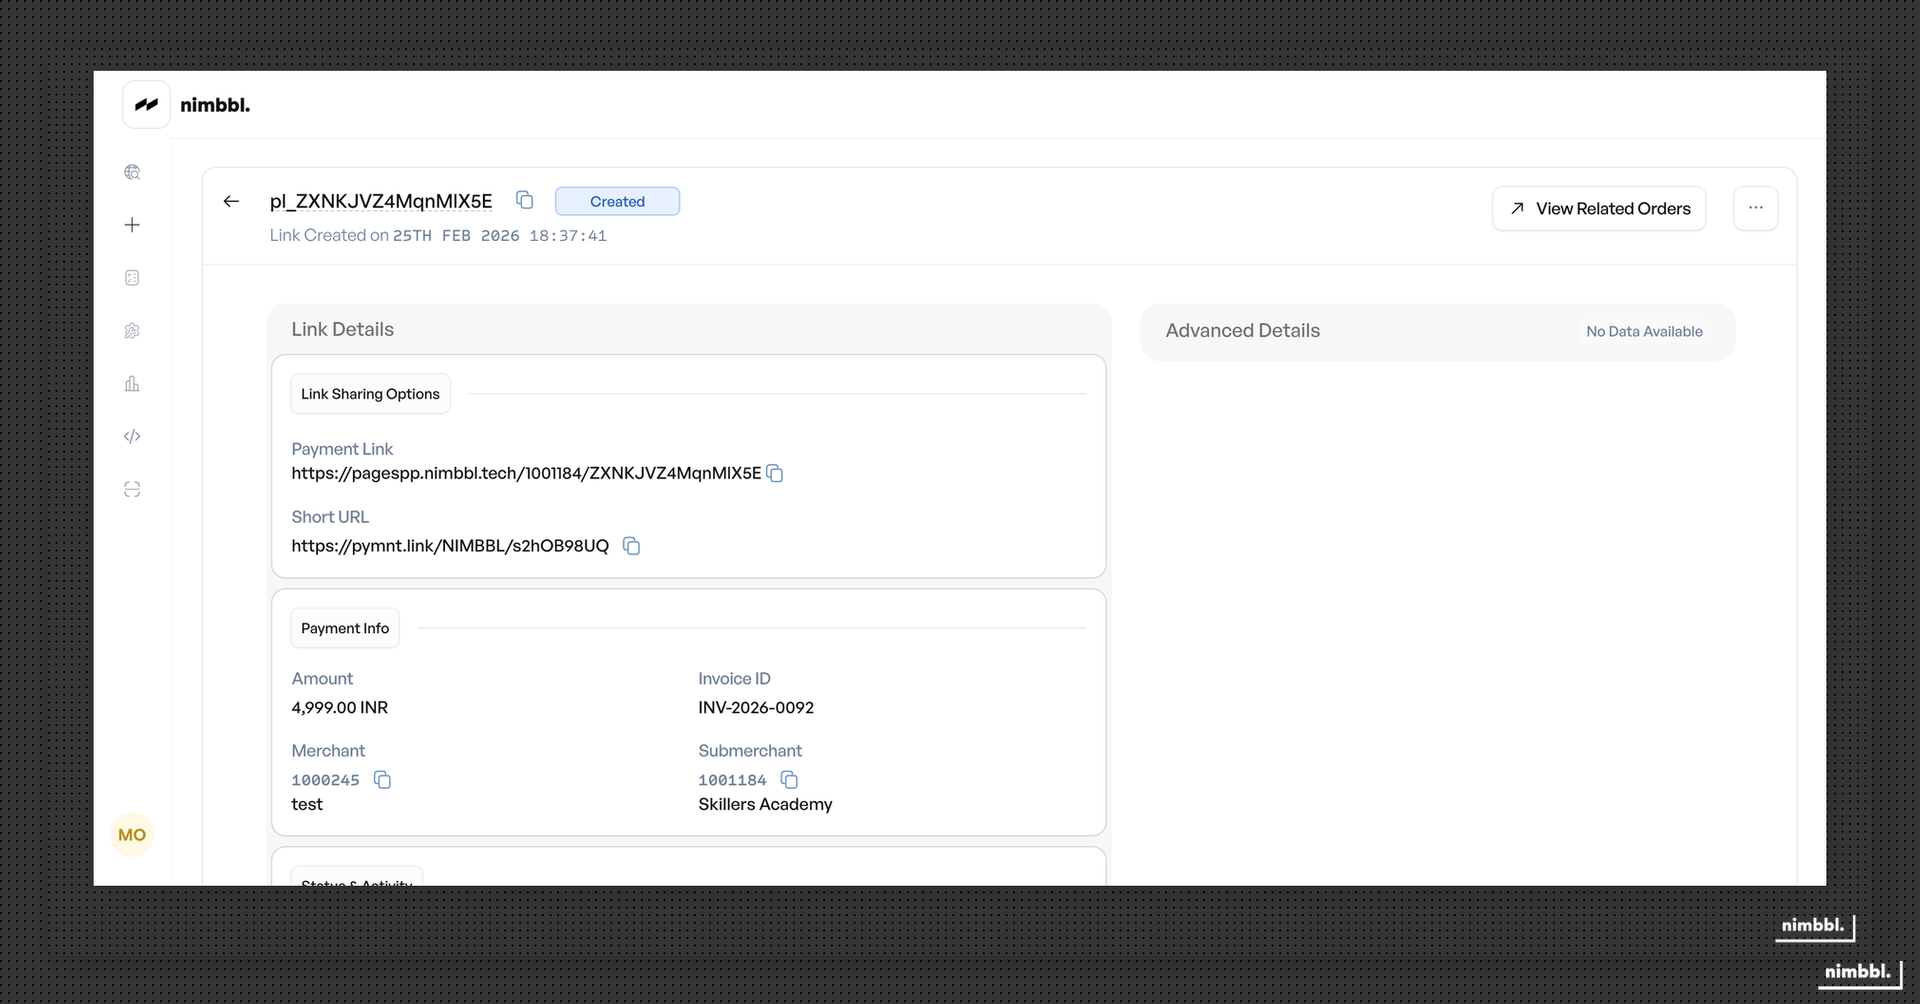
Merchant and submerchant -- select the merchant and submerchant for this payment.
Currency -- select the payment currency.
Invoice ID -- enter a unique identifier from your system. The Invoice ID must be unique per merchant/submerchant combination. It cannot be changed after the link is created.
Reusing an Invoice ID that already exists for the same merchant/submerchant combination will result in an error and the Payment Link will not be created. Always use a unique Invoice ID for each link.
Expiration -- set a date and time when the link expires. The expiration must be in the future. After this time, the link automatically becomes unavailable for payment. If no expiration date is selected, the link expires after 90 days by default.
Description and Terms -- optionally add a description and terms and conditions URL that customers see on the payment page.
Duplicate Link -- when viewing an existing Payment Link, you can click Duplicate Link to open the creation form pre-filled with all fields from the original link. The Invoice ID field is cleared so you must provide a new unique value.
Customer Information
The Customer tab collects recipient information and notification preferences.

Customer information -- enter the customer's first name, last name, mobile number (with country code), and email address. Whether the email address is required depends on the Email ID required setting configured for the submerchant. When enabled, the email field is mandatory and the link cannot be created without it. When disabled, email is optional. This setting is managed at the submerchant level — contact Nimbbl support if you need to change it.
Notify customer toggle -- when enabled, select one or more notification channels: SMS, Email, or WhatsApp. You can schedule notifications for immediate or future delivery. Available channels depend on your submerchant configuration — contact [email protected] to enable WhatsApp for your account.
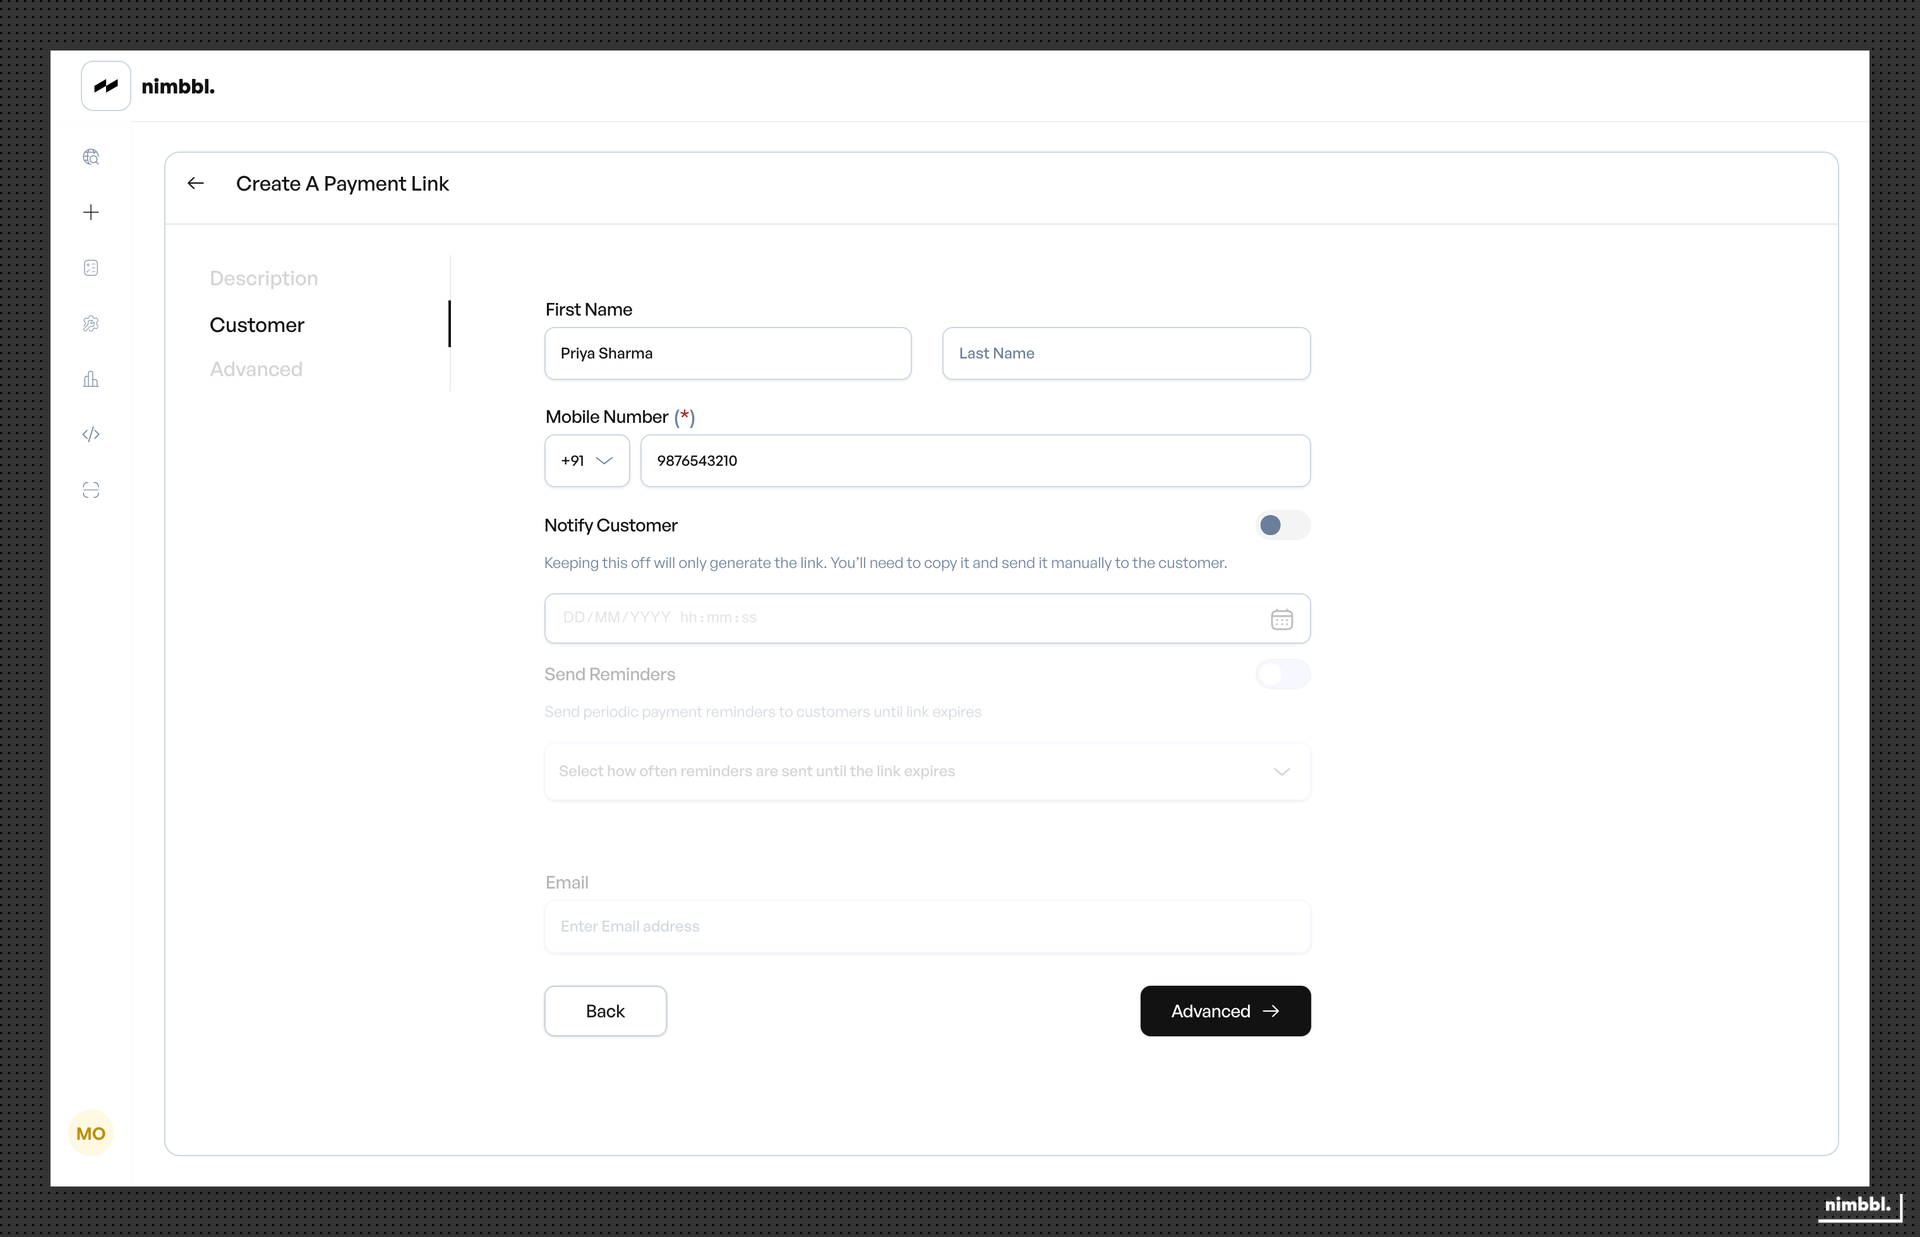
When the toggle is off, the link is created in generate-only mode. No notifications are sent, and you share the link manually.
Reminder notifications -- after the initial notification, you can enable automatic reminders that re-send the link to the customer at a regular interval. Choose from Every 12 hours or Every 24 hours. Reminders continue until the link is paid, cancelled, or expires.
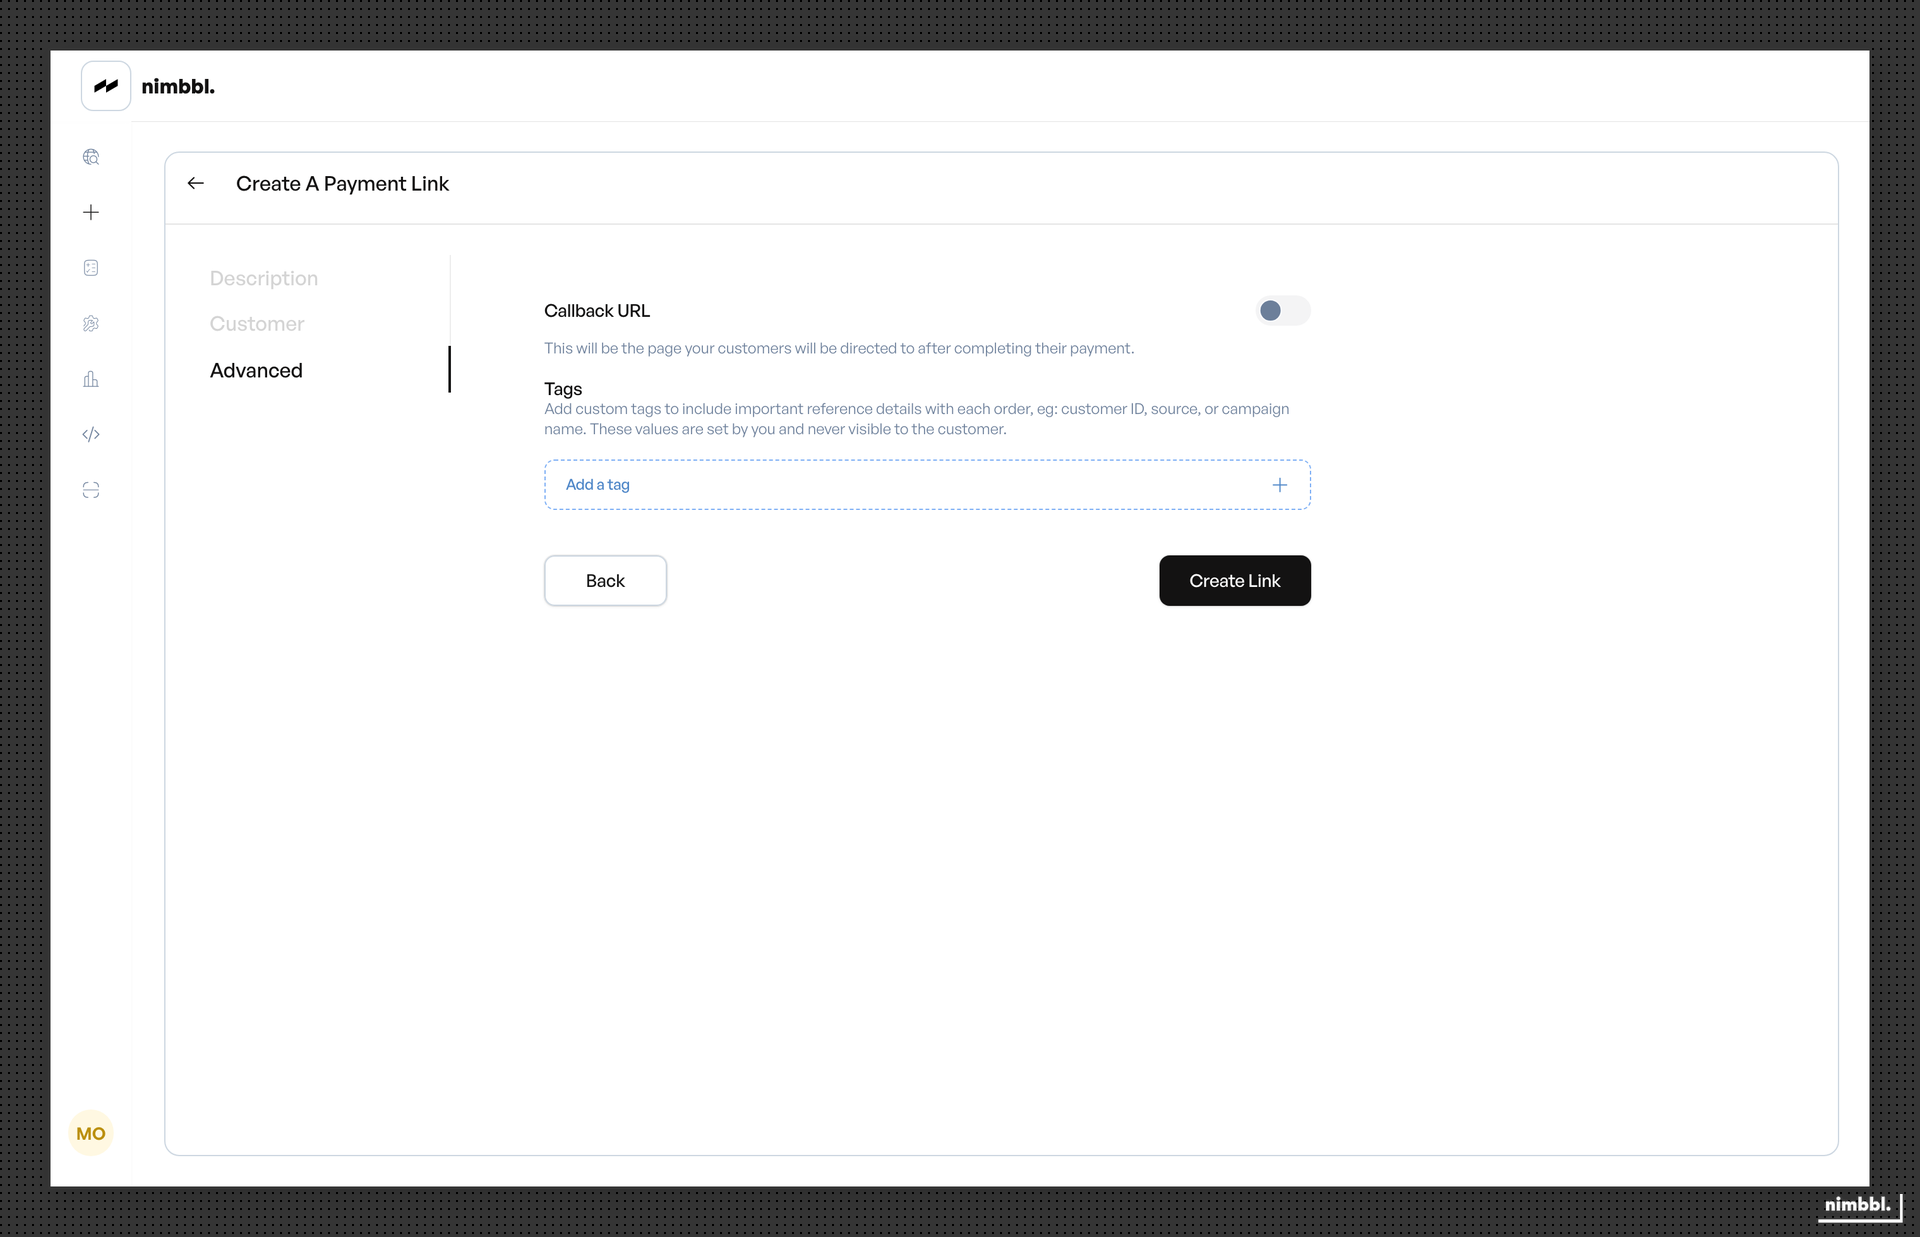
Advanced Configuration
The Advanced tab provides optional configuration for callbacks, verification, and custom metadata.
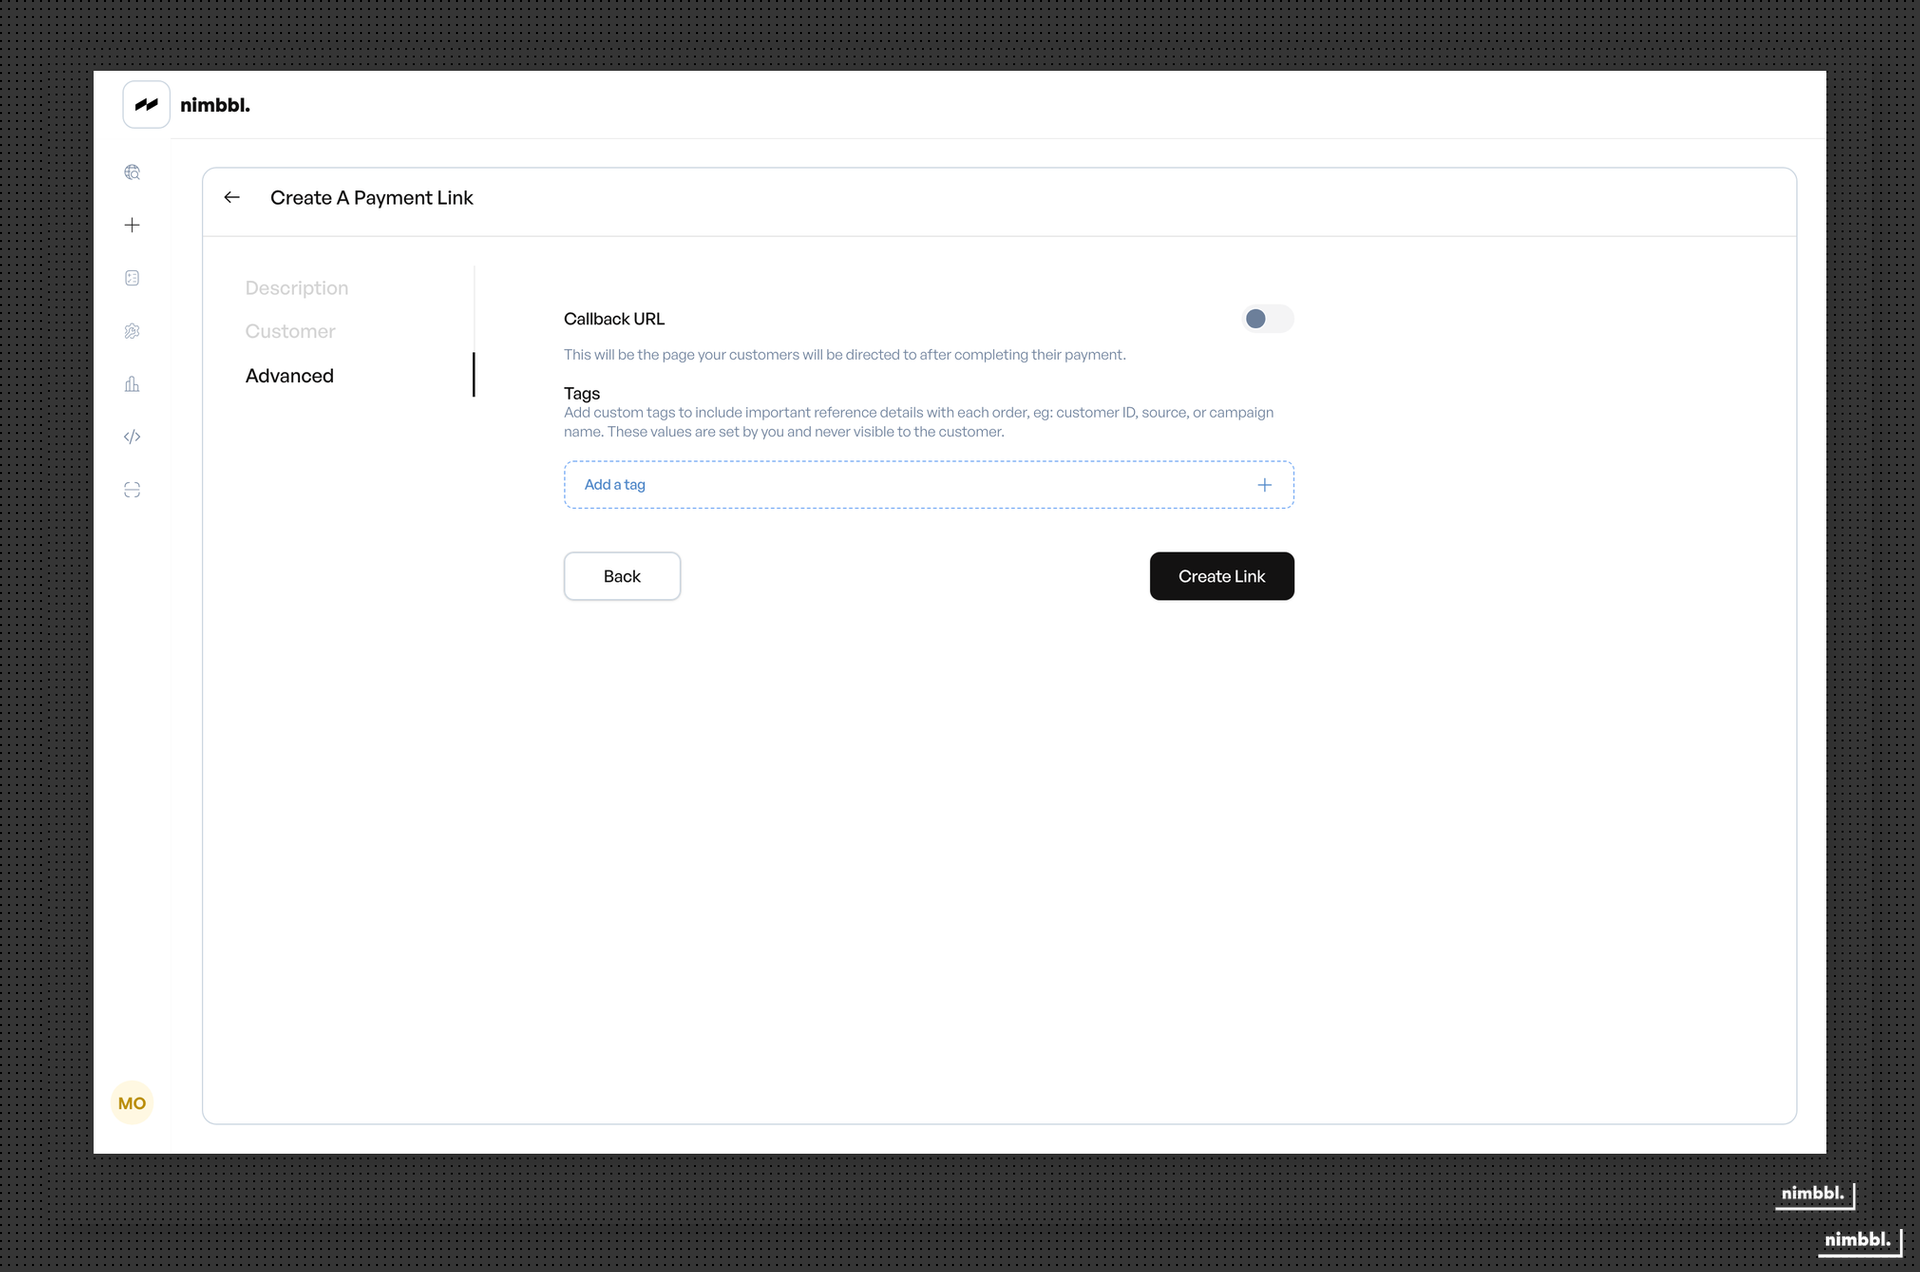
Callback URL -- toggle to enable a custom redirect URL. After payment, the customer is redirected to this URL instead of the default Nimbbl success or failure page. The callback receives Base64-encoded payment details. The callback URL cannot be changed after link creation.
Third Party Verification (TPV) -- toggle to enable bank account verification. When enabled, enter the account number, IFSC code, and account holder name.
Custom tags -- add key-value pairs to attach custom metadata to the link. Tags are included in order creation and available in webhooks and callbacks. Use them for campaign tracking, order references, or any internal identifiers.

Creating and Sharing the Link
After filling in all required fields, click Create Link. The link is generated with a unique ID. If notifications are enabled, they are sent immediately or at the scheduled time. You can also copy the link URL to share manually.
Creating Payment Links via API
For automated or high-volume workflows, use the Payment Links API to create links programmatically.
When to use the API -- use the API when you need to create links from your own application, automate link generation based on business events, or integrate link creation into existing systems.
The main API endpoints are:
- Create Payment Link (
POST /api/v3/payment-link) -- create a new link with amount or product line items, customer details, expiration, and optional callback URL. The Invoice ID must be unique per merchant/submerchant. - Update Payment Link (
PATCH /api/v3/payment-link) -- modify an existing link when its status iscreated. You can update customer name, amount, expiration, currency, line items, bank account, and custom attributes. - Payment Link Enquiry (
POST /api/v3/payment-link/enquiry) -- retrieve link details including status, orders, transactions, and payment history. - Payment Link Actions (
POST /api/v3/payment-link/actions) -- perform actions on links:senddispatches notifications,cancelcancels an active link.
Authentication uses token-based access with your access key and secret from Developer Settings.
For detailed request and response structures, code examples, and complete field definitions, see the Payment Links API Reference.
Bulk Payment Link Creation
You can create multiple Payment Links at once by uploading a file through Command Center Files. Prepare a file with the required fields, upload it, and Nimbbl processes each row to create individual links. See the Uploads guide for file format requirements and status tracking.