
Command Center is Nimbbl's unified control and insights layer for merchants and partners. It brings payment operations, transaction data, team collaboration, and integration configuration into a single interface. Instead of switching between multiple tools, you manage everything from one place.
Whether you are a merchant owner tracking daily transactions, a manager overseeing team access, or an agent handling payment links, Command Center provides the tools you need in a single interface. The sidebar menu organizes all capabilities into six main areas -- Getting Started, Search, Create, Files, Manage, and Developer Settings -- so you can move between tasks quickly. Each area covers a distinct set of workflows, from searching orders to configuring API credentials.
Command Center integrates with Nimbbl's product suite -- Sonic (checkout), Orbit (payment processing), Pulse (routing), and Boostr (conversion) -- so you can configure and operate your payment setup end to end. When you create a payment link, it flows through Sonic for checkout and Orbit for processing. When you set up an offer, Boostr applies it at the right moment. Command Center is where you bring these products together and control how they work for your business.
Partners who support multiple merchants also use Command Center. The interface adapts based on your role and permissions, showing the merchants and sub-merchants you are responsible for. You can filter data, manage team members, and access settings scoped to the entities you oversee.
This page provides an overview of Command Center and links to detailed documentation for each area. Start here to understand what Command Center offers, then follow the links to the section that matches your task.
Who Uses Command Center
Command Center serves different roles across merchant organizations and partner networks.
- Owners have full access to all areas, including team management, developer settings, and billing. They set up the initial configuration and oversee operations.
- Managers handle day-to-day operations such as creating payment links, reviewing transactions, and managing team members within their scope.
- Agents focus on operational tasks like searching orders, creating payment links, and handling customer-related workflows.
- Viewers have read-only access and can browse transactions and reports without making changes.
Partners who manage multiple merchants see an additional layer of hierarchy. They can filter by merchant and sub-merchant, and their access reflects the specific entities assigned to them. The interface adjusts automatically based on your role, so you always see the tools and data relevant to your responsibilities.
What is Command Center
Command Center is the operational hub where you run day-to-day payment operations. It provides a centralized interface to search orders and payments, create payment links and payment pages, manage offers and subventions, handle file-based operations, and configure your integration settings. The main menu gives you fast access to every area, so you can move between tasks without context switching.
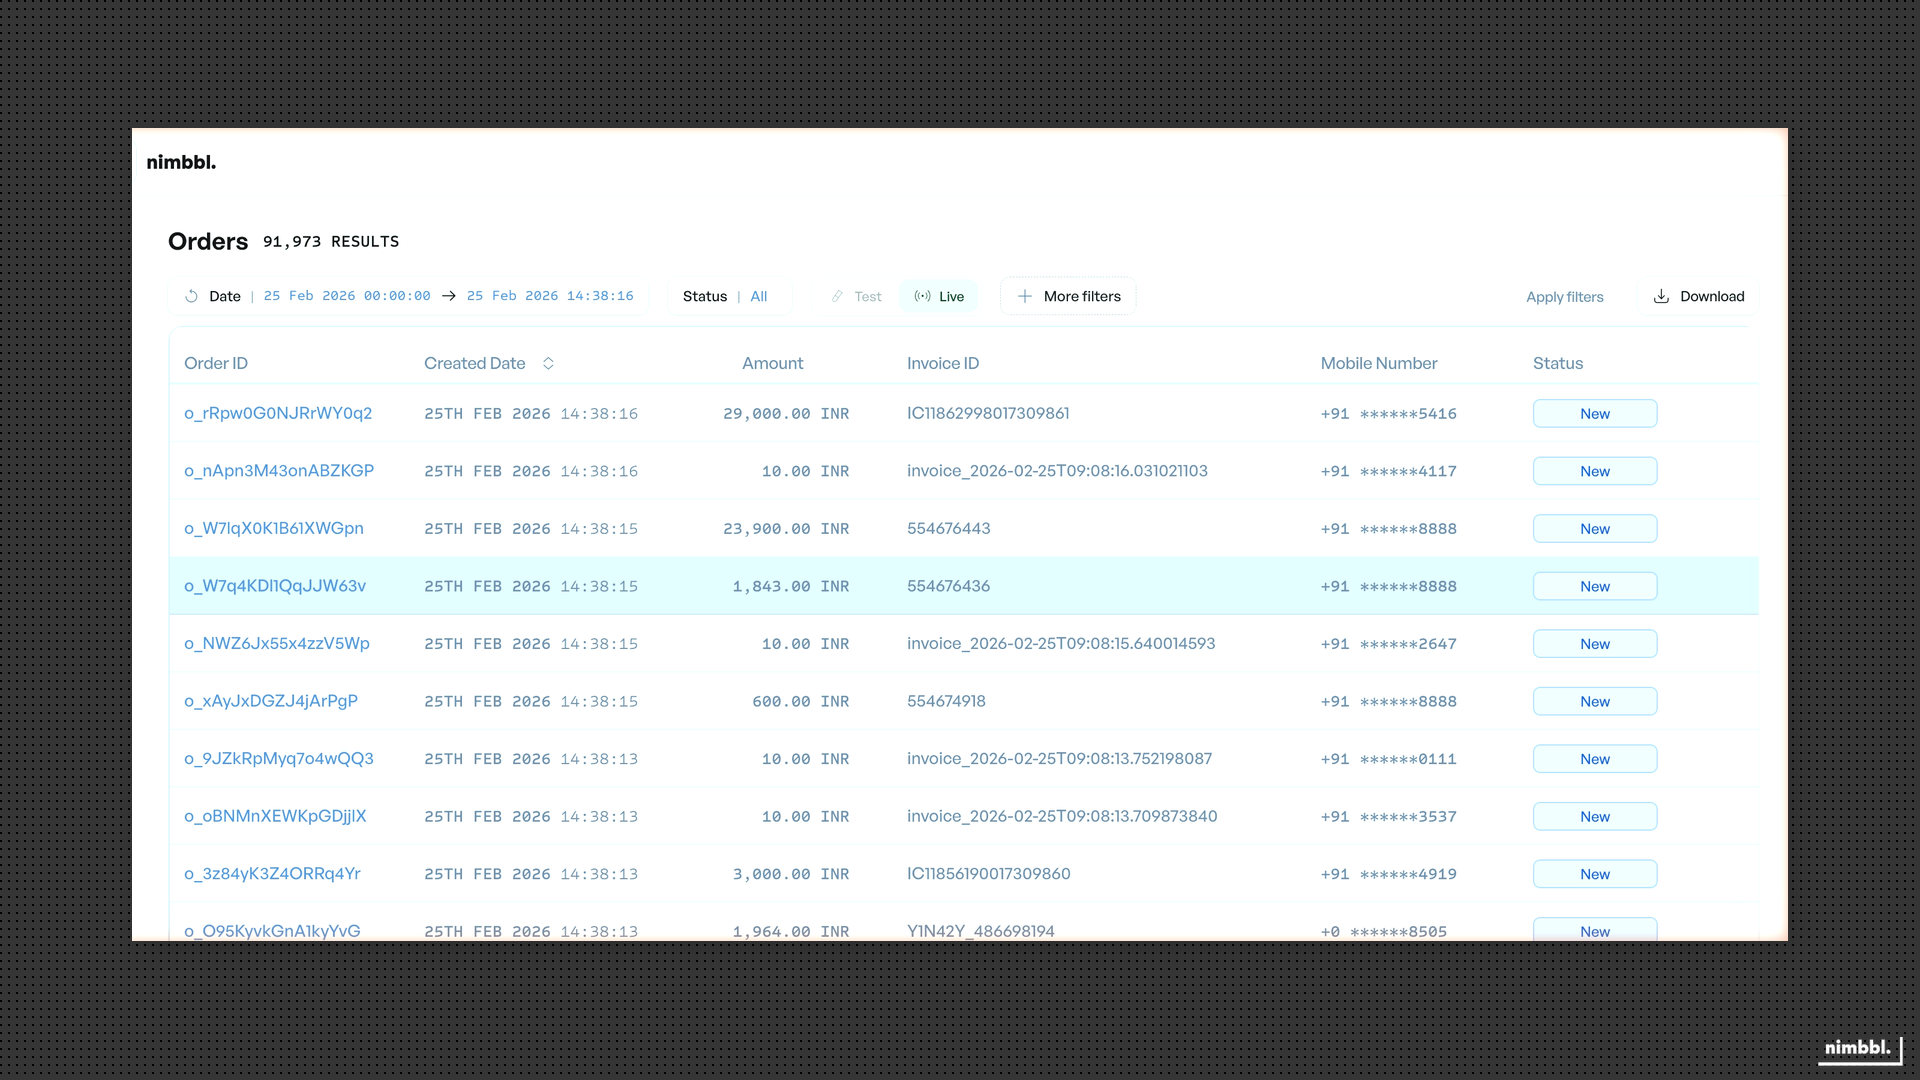 Command Center main navigation and content area
Unified Control Layer
Command Center centralizes the management of your payment operations. Rather than working across separate tools for orders, payments, refunds, payment links, team access, and API configuration, you handle all of these through one interface. The sidebar menu is the primary navigation element. It organizes capabilities into logical areas -- Search for finding and inspecting transactions, Create for building payment collection resources, Files for data exports and bulk operations, Manage for team and profile settings, and Developer Settings for integration configuration. This structure keeps every operational task within reach, regardless of your role. When you select an area, the content view updates to show the relevant list, form, or detail page.
Insights and Reporting
Beyond control, Command Center supports data-driven decisions. The Search section lets you browse and filter orders, payments, and refunds with advanced criteria -- date ranges, statuses, payment modes, amount ranges, and more. You can drill into individual transaction details, follow links between related entities (such as from an order to its payments), and share filtered views with colleagues by copying the URL. The Files section complements Search by supporting data export and bulk operations. You can download filtered transaction data as CSV or Excel files for reconciliation, reporting, or offline analysis. Together, Search and Files help you analyze transaction data, reconcile records, and keep operations in sync.
Relationship to Nimbbl Products
Command Center works with all Nimbbl products. It is the configuration and management layer that sits on top of the product suite. Sonic powers the checkout experience that your customers see. Orbit handles payment processing and settlement. Pulse manages intelligent payment routing. Boostr drives conversion through offers, subventions, and affordability programs.
When you create a payment link or payment page in Command Center, Sonic renders the checkout and Orbit processes the transaction. When you configure an offer or subvention, Boostr applies it during checkout. When you view a payment's details, the data reflects routing decisions made by Pulse and processing handled by Orbit. For product-level concepts and deeper explanations, see the Products section.
Getting Started
To begin using Command Center, you need access credentials and a brief orientation to the interface. This section covers first-time access, profile setup, and common tasks to help you get productive quickly.
First-Time Access
To access Command Center, log in with the email and password for your merchant or partner account. If you have not set a password yet, use the Set Password link sent to your email. First-time users receive an email invitation with a link to create their password. After setting your password, you can log in at any time.
If you forget your password, use the Forgot Password flow to request a reset link. Password reset links expire after a limited time, so complete the process promptly. For the full login flow, password setup, and account recovery steps, see Getting Started.
Profile Setup
After your first login, review your personal profile. Go to Manage and open Profile to verify your name, email, and contact information. You can update your password from this page as well. Keeping your profile current ensures that notifications and account recovery flows reach the right address. For details on profile fields and editing, see Profile.
Common Tasks
Once you are logged in, you can begin working with Command Center immediately. Here are the most common starting points:
- View orders and payments -- Go to Search and select Orders or Payments. Apply filters to narrow results by date, status, or payment mode. See Search.
- Create a payment link -- Go to Create and select Payment Links. Fill in the payment details, configure options, and share the link with your customer. See Create.
- Export transaction data -- Go to Search, apply your filters, and select Download. The exported file appears in Files when it is ready. See Files.
- Add a team member -- Go to Manage and select People. Add the new user's email and assign a role. See Manage.
- View API credentials -- Go to Developer Settings and select Credentials. View or download your access key and secret. See Developer Settings.
Each task links to a detailed guide with step-by-step instructions and screenshots.
Key Features
Command Center organizes its capabilities into six main areas. The table below provides a quick reference for each area, its purpose, and a link to the detailed documentation.
| Area | Purpose | Key Capabilities | Documentation |
|---|---|---|---|
| Getting Started | Access and account setup | Login, forgot password, set password, session expired | Getting Started |
| Search | Browse and filter transactions | Orders, Payments, Refunds | Search |
| Create | Build payment assets and programs | Payment Links, Payment Pages, Offers, Subventions | Create |
| Files | File-based operations | Downloads, Uploads | Files |
| Manage | Team and business management | People, Profile | Manage |
| Developer Settings | Integration configuration | API Credentials, Payment Partners | Developer Settings |
The sections below describe each area in more detail.
Transaction Management
Use Search to find and filter orders, payments, and refunds. Each entity type has its own list view with filtering, pagination, and sorting controls. Narrow results by date, status, payment mode, amount range, and many other criteria. Click any row to open the detail view, where you can inspect the full record and navigate to related entities -- for example, from an order to its payments, or from a payment to its refunds. Search is the primary area for inspecting and managing transactions. See Search.
Payment Collection
Use Create to set up payment links and payment pages. Payment links are shareable URLs that collect payment from a customer for a specific amount or product. Payment pages are branded, full-page checkout experiences with custom data fields -- useful for event registrations, donations, or any scenario where you need to collect additional information alongside payment. Both resource types work with Sonic for the checkout experience and Orbit for payment processing. See Create.
Incentivization and Affordability
Use Create to configure offers and subventions. Offers let you run promotions such as percentage discounts, flat-amount discounts, or cashbacks that target specific payment modes and products. Subventions reduce the interest customers pay on EMI, enabling no-cost or low-cost EMI campaigns. These features are part of the Boostr product suite and are applied automatically during checkout. See Create.
Team Management
Use Manage to control who has access to Command Center and what each person can do. Add team members, assign roles (Owner, Manager, Agent, Viewer), and scope access to specific sub-merchants. You can also review and update your personal profile from this section. Role-based access control ensures that each team member sees only the areas and data relevant to their responsibilities. See Manage.
Integration Management
Use Developer Settings to manage API credentials and payment partner connections. Credentials authenticate your API requests when integrating Nimbbl into your application. Payment partner connections link your provider accounts (such as Razorpay) with Nimbbl so that payments can be processed on your behalf. Both are essential for a working integration. See Developer Settings.