Creating Payment Pages
Payment Pages are created exclusively through the Command Center UI. There is no API for Payment Pages. To get started, navigate to Create and select Payment Pages, then click Create a Page. The creation form has two tabs: Description and Attributes.
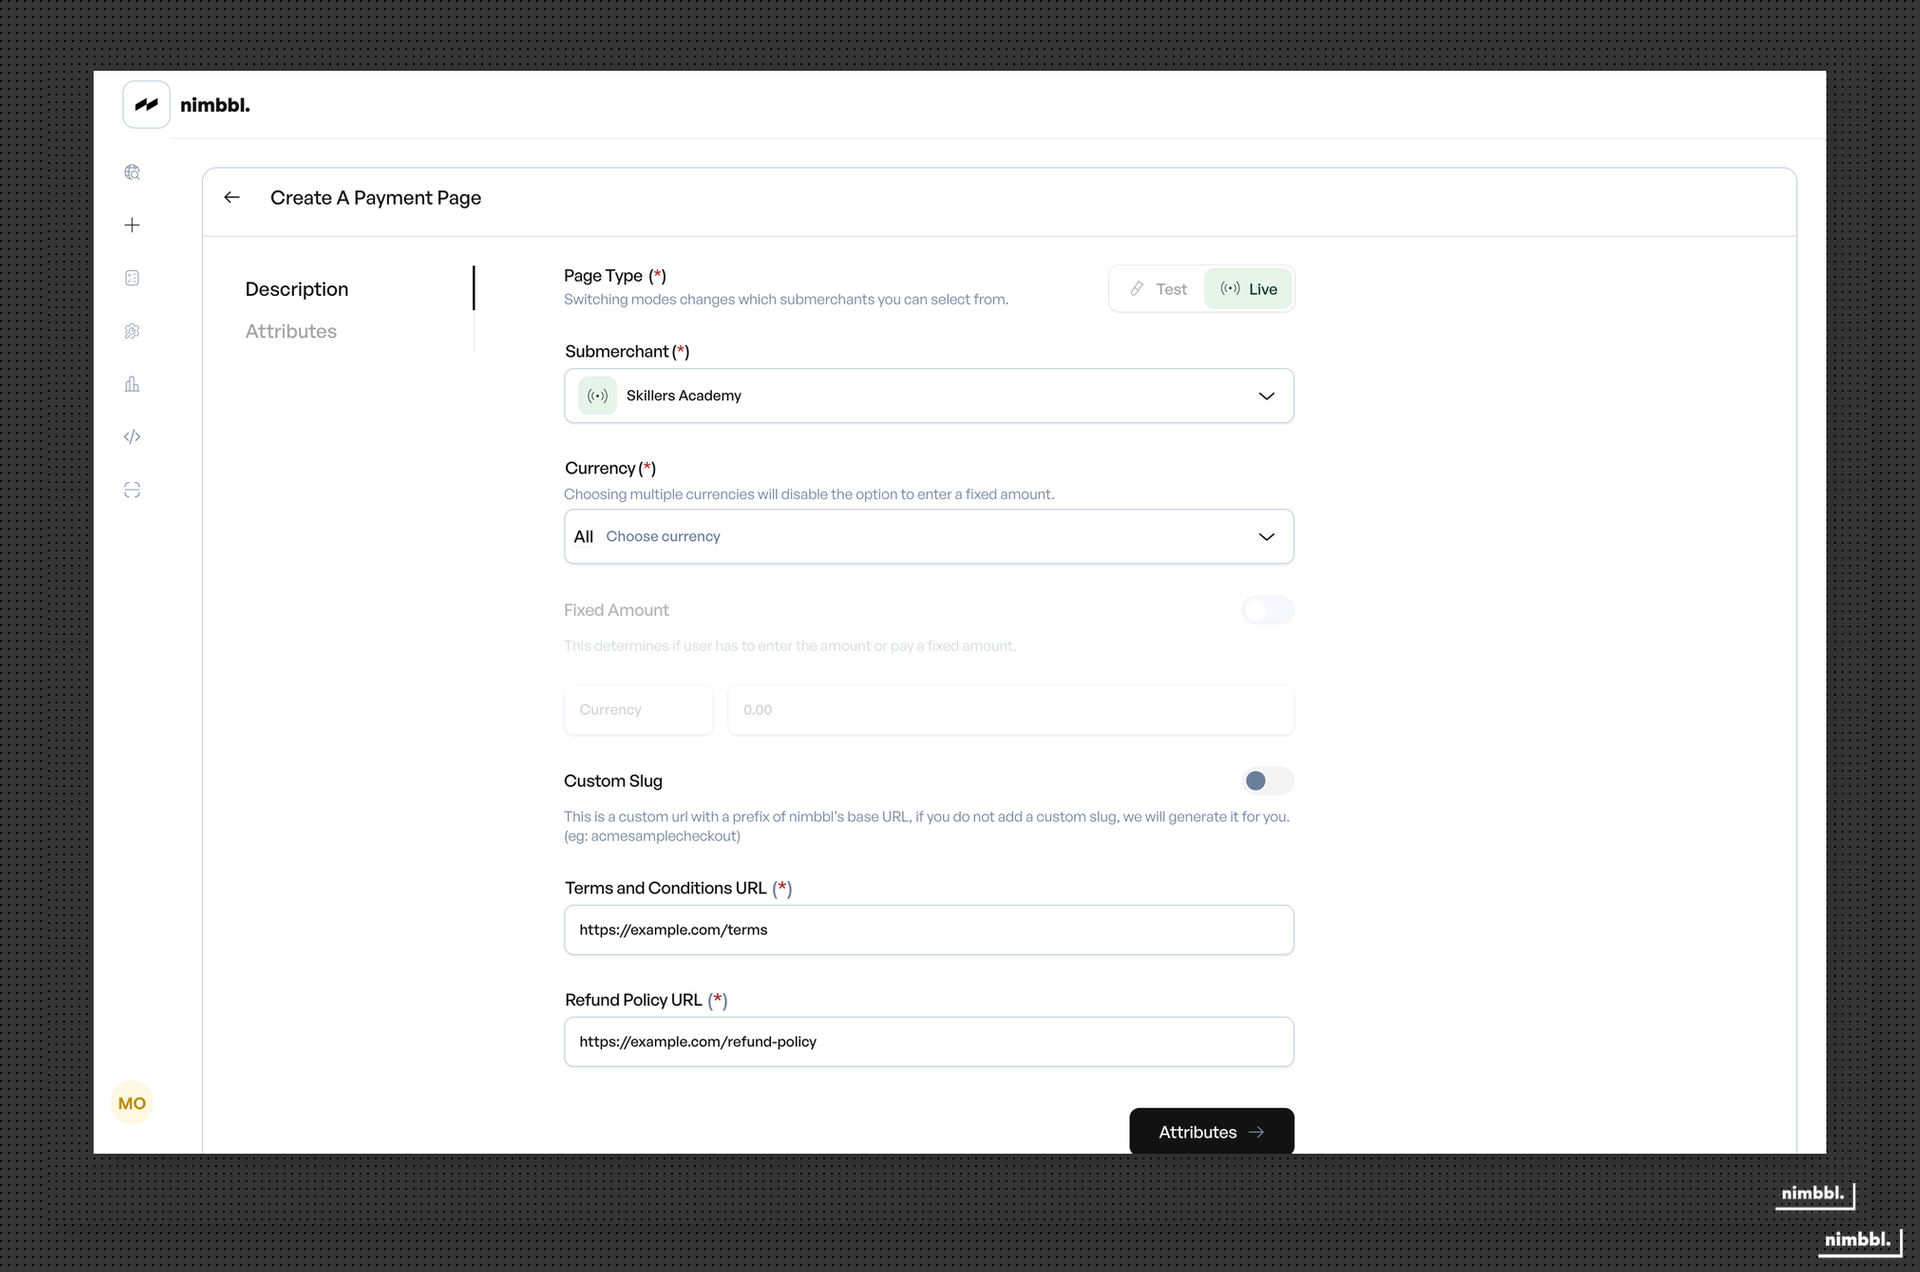
Configuration
The Description tab is where you configure the basic page settings, branding, and amount type.
Basic Information
Page name -- a name for the payment page, visible in the Command Center for your reference and displayed to customers.
URL slug -- the custom identifier that appears in your page URL. For example, entering indie-sportz gives you pages.nimbbl.tech/indie-sportz. Follow standard URL format and use hyphens to separate words.
Amount Configuration
Fixed or Custom amount -- choose the amount type for your page:
- Fixed amount -- enter the exact amount every customer will pay. The amount appears pre-filled on the customer form and cannot be changed by the customer.
- Custom amount -- customers enter their own amount on the payment form. Use this for donations, variable fees, or pay-what-you-want scenarios.
Currency -- select the payment currency. If your account supports multiple currencies, customers can select from the available options.
Branding
Brand name -- the name displayed on the payment page header.
Logo -- upload your brand logo. The image should be at least 200x200 pixels for best display quality.
Color theme -- set the accent color for the payment page using a hex code (6 characters). This color is applied to buttons, headers, and other visual elements.
Terms and Policies
Terms and Conditions -- provide a URL to your terms and conditions document. The link is displayed on the payment page so customers can review before paying.
Refund Policy -- provide a URL to your refund policy. Displayed alongside the terms and conditions link.
Custom Attributes
The Attributes tab is where you add custom fields to collect additional information from customers. Custom fields appear on the payment form alongside the standard customer details.

You can add up to ten custom fields per page. Each field is configured with a type, label, help text, and whether it is mandatory or optional.
The five supported field types are:
- Text -- free-form text input with optional regex validation
- Dropdown -- a list of predefined options
- Boolean -- a yes/no selection
- Date -- a date picker
- Date and Time -- a date and time picker
Click Add Field to add a new custom field, then configure its properties. Fields are displayed to customers in the order you define (sequence).
For detailed configuration options and validation rules for each field type, see Custom Fields for Payment Pages.
Creating and Sharing
After filling in the required fields on both tabs, click Create Page. The page is generated with your custom URL slug and is immediately active.

Once created, share the page through:
- SMS -- send the page URL to customers via SMS
- Email -- send the page URL to customers via email
- Copy link -- copy the URL to share through WhatsApp, social media, or any channel
- Website embed -- embed a Pay Now button on your website that links to the payment page
- QR code -- convert the page URL to a QR code for offline or print distribution
Customize your page with your brand logo, URL slug, and color theme to build trust with your customers. Adding Terms and Conditions and Refund Policy links further increases customer confidence.