Shopify
Nimbbl supports easy acceptance of payments on your Shopify store. We have created a simple plugin that you can install on your store. This guide will explain the step-by-step process to integrate the plugin.
- To see our checkout in action on Shopify, visit the live demo store and perform a live transaction. Please use the password
umohsato access the test store.
Compatibilities and Dependencies
- Active Shopify account with a Store
Install Plugin
-
Sign in to your Shopify store
-
Go to settings > Payments
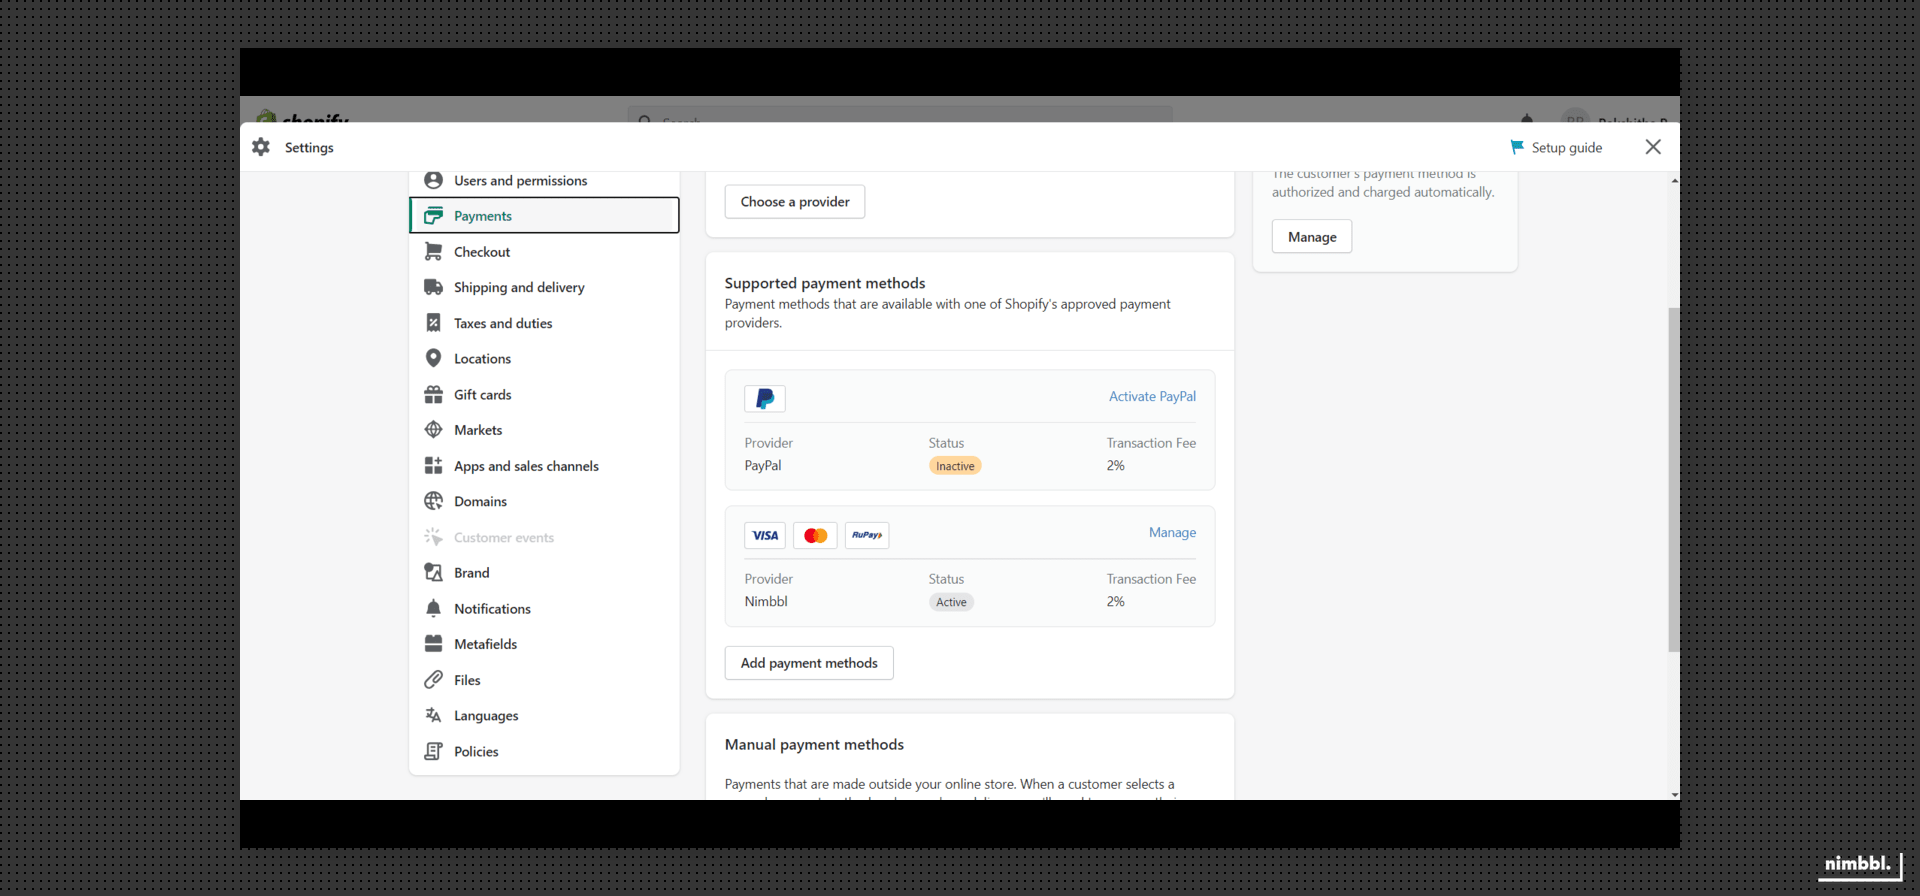
- Click on "Add payment modes". Select Seach by a provider and select Nimbbl.
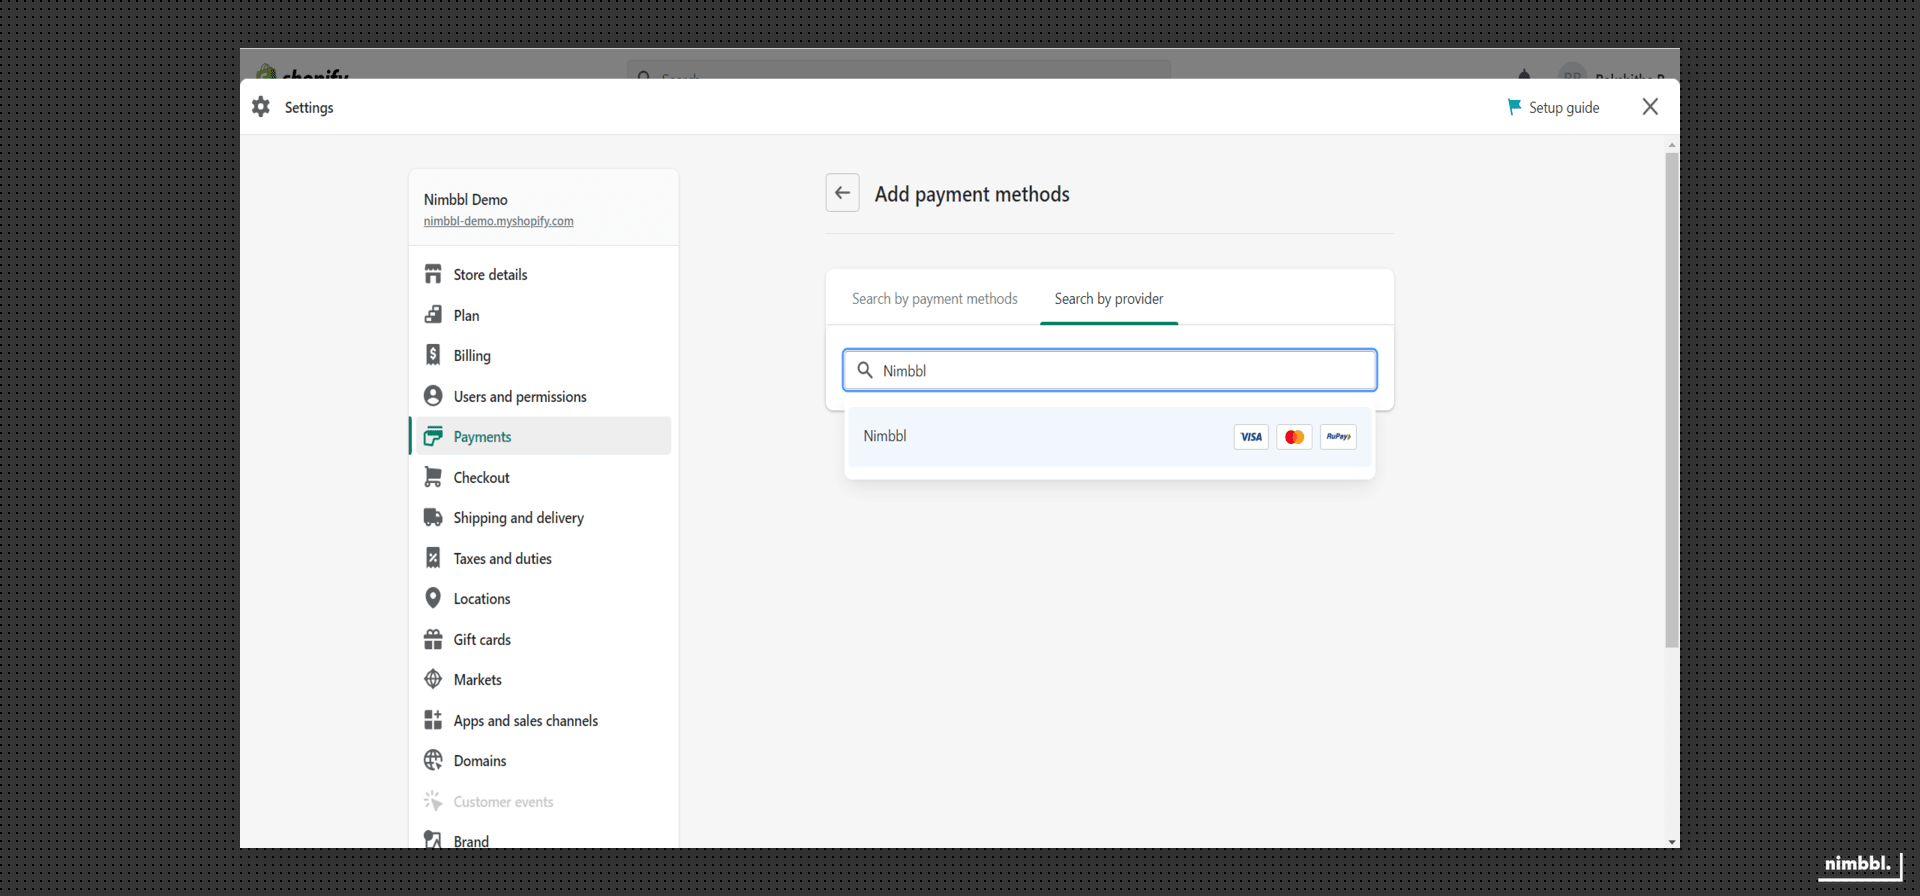
If you can't find the app, visit the Nimbbl Payments app listing on the Shopify App Store.
Configure Plugin
Once the plugin has been installed, you need to configure it so you can start accepting payments. There are multiple configurations that you can do to customise the plugin for your needs.
Enable Nimbbl
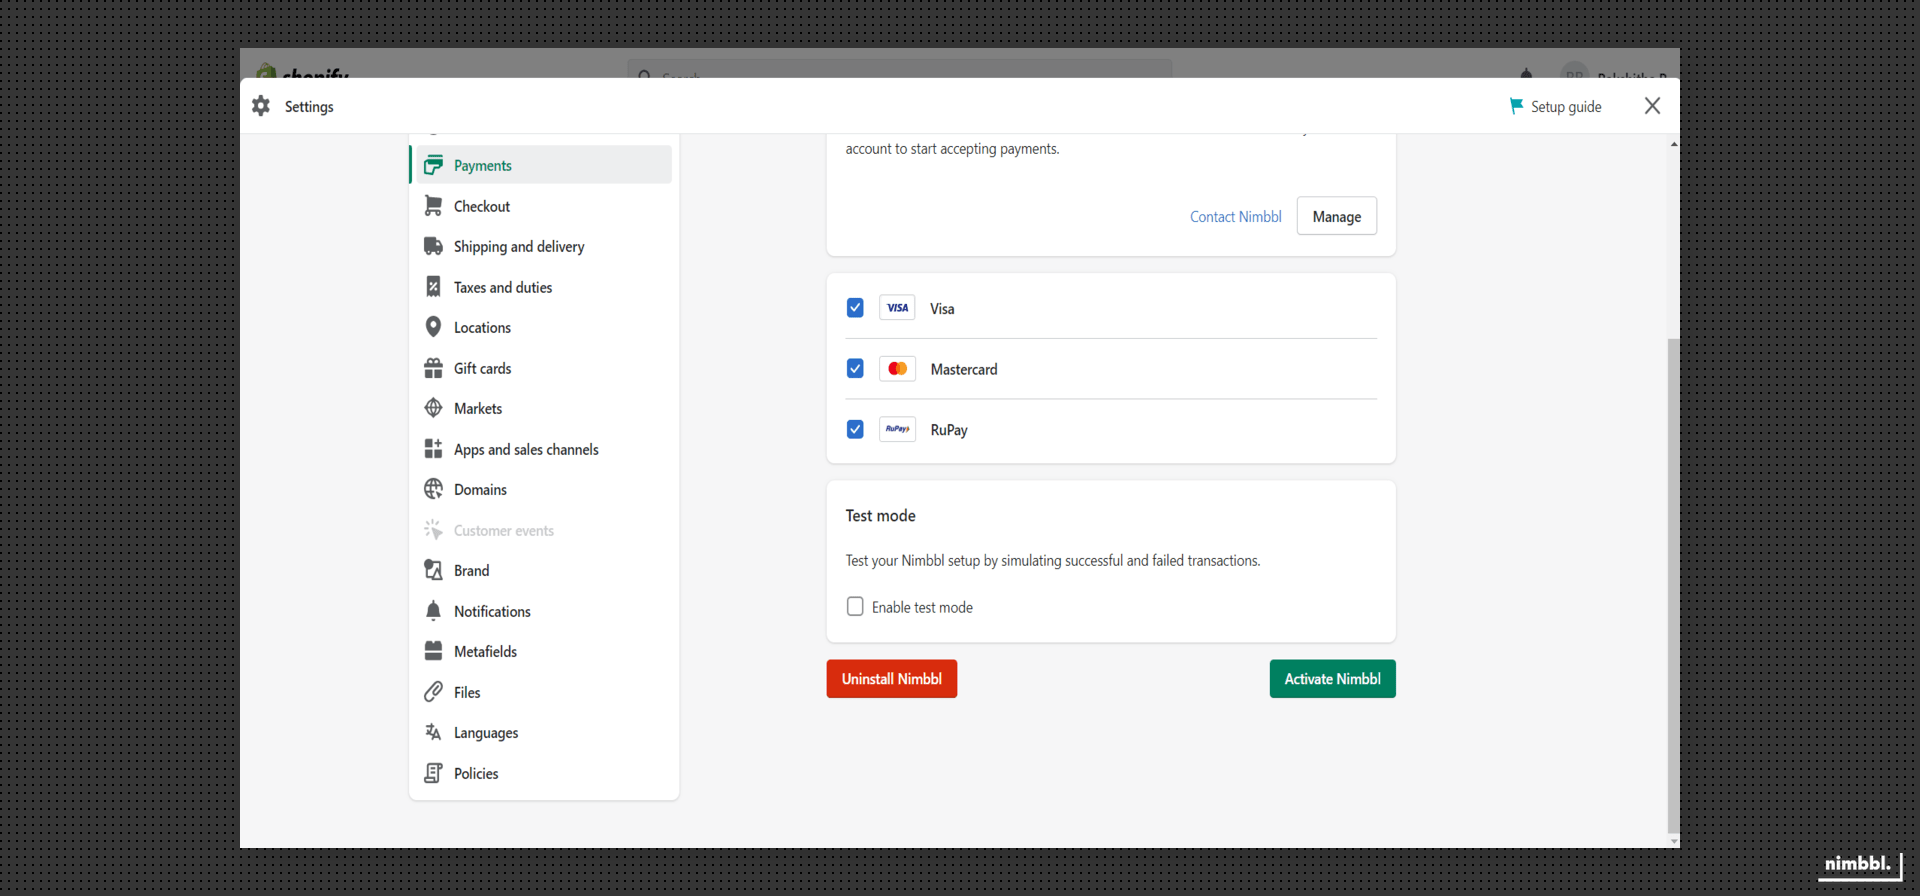
To accept payments through Nimbbl, the plugin should always be Activated. If you deactivate the plugin, the Nimbbl option will not show up on your checkout page.
- To Enable - Click on "Activate Nimbbl Nimbbl"
Managing Credentials & Environments
The Nimbbl Shopify Plugin works for both Test and Live environments. You can configure different keys for each environment and toggle settings to use different environments.
- Enable/Disable Test Mode
- Enabling Test mode does not affect your Live data or interact with the banking networks.
- Disabling Test mode changes your store Live mode resulting in actual transactions and money being deducted from your bank or card.
- Click on "Manage" to enter your Keys
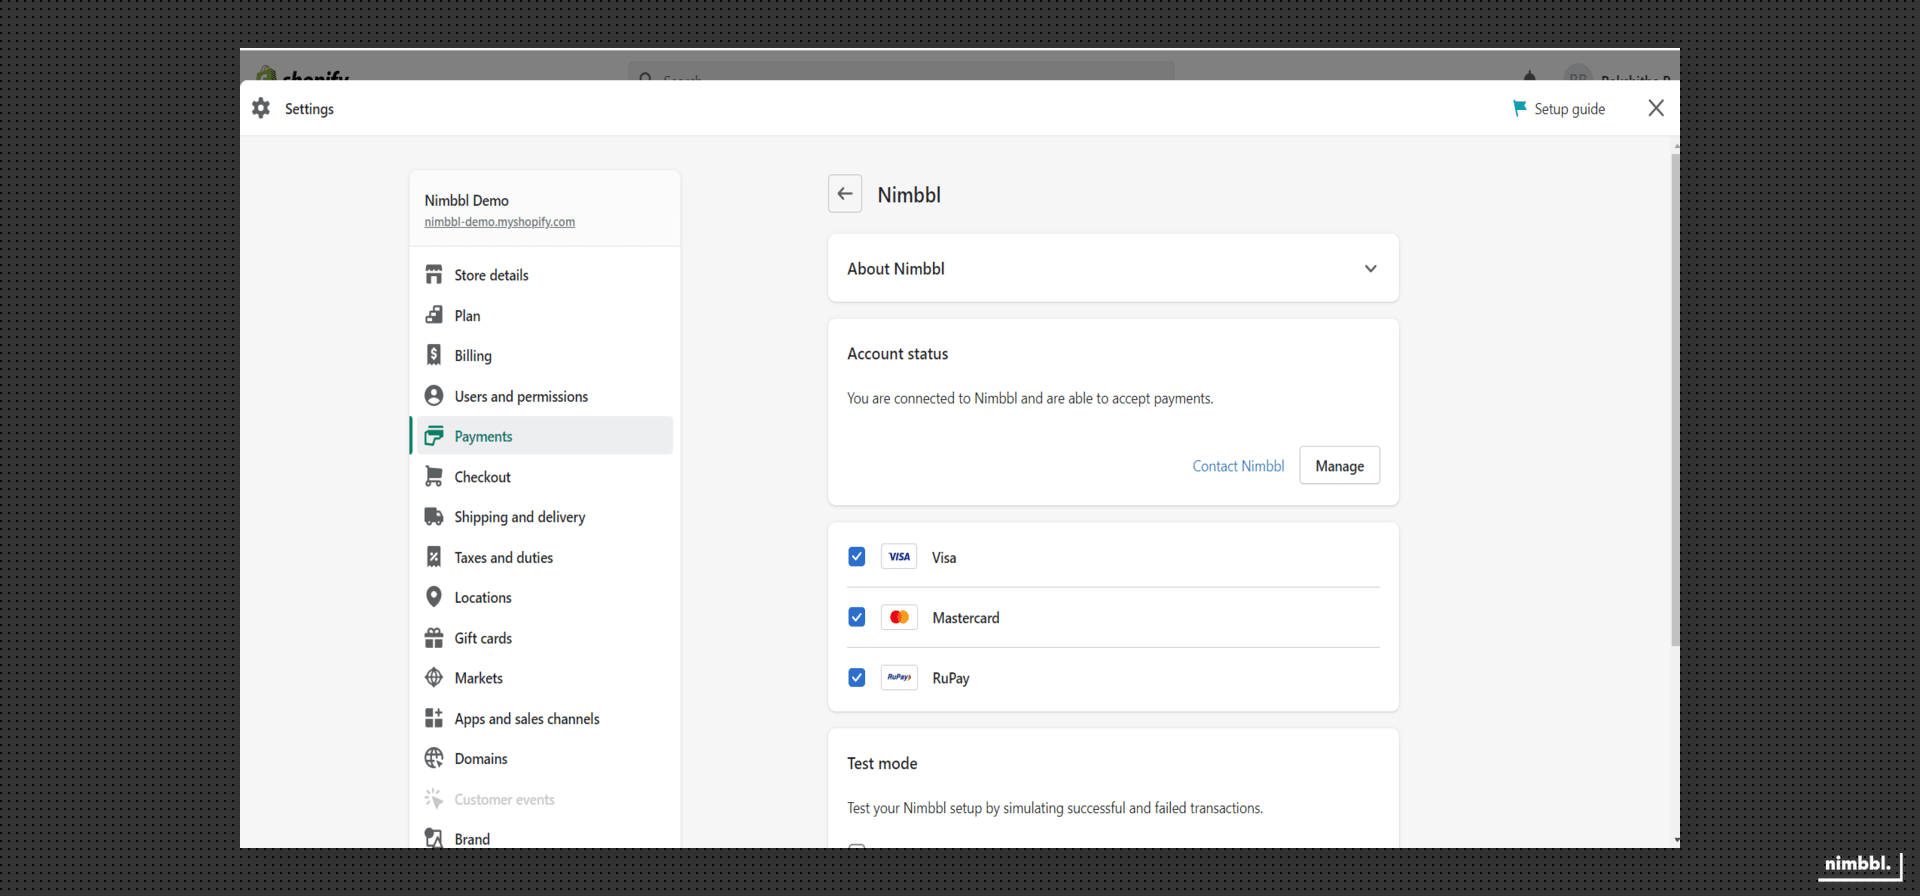
- Add in your Live and Test
access_keyandaccess_secretavailable in the Nimbbl Command Center. Enter the endpoint URL ashttps://api.nimbbl.techfor both Environments
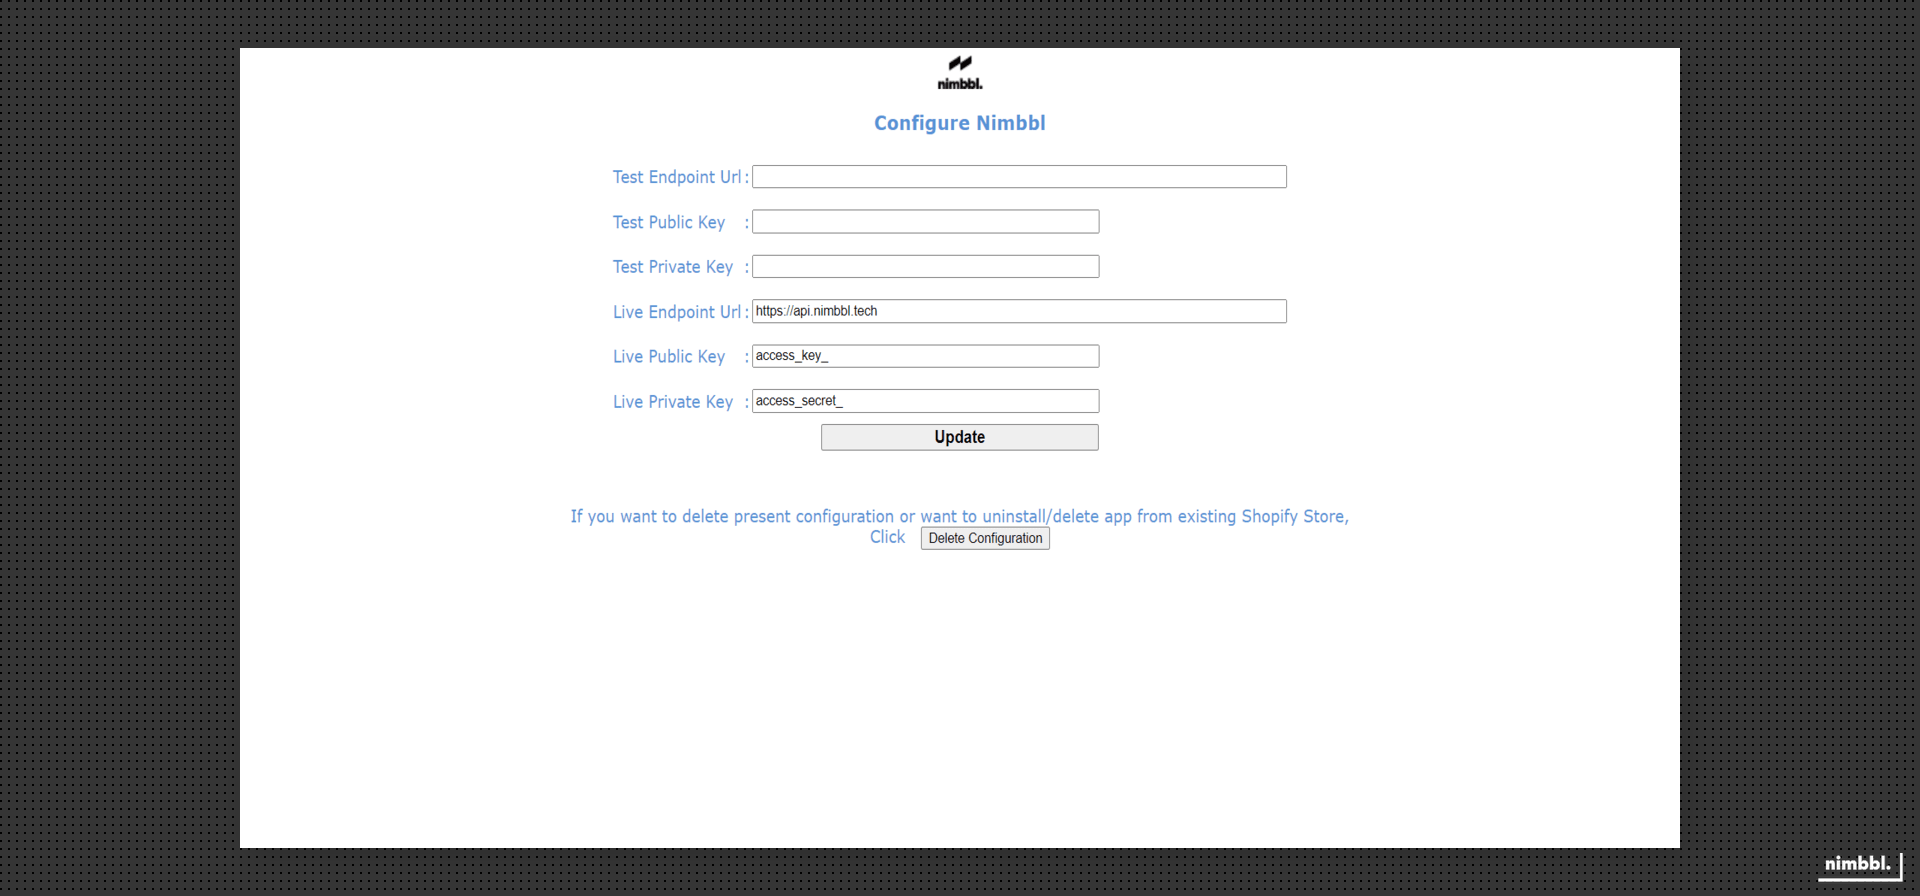
- If you don't currently have Live keys, you can keep it blank and update it later.
access_secretis like a password, please don't share with others.
Test Your Store
Ensure the Test Mode is enabled as shown above. You can test your store by using these test values.
Go Live
Once everything is running fine in the test mode, you can write to us at [email protected]. We will review your integration and help you get ready to go on production.
In parallel, ensure that you or your team has completed your payment partner documentation so that the payment partner of your choice can approve your credentials.
If you already have live payment partner credentials, please keep them handy as we can assist you further with the onboarding process using these keys.
As soon as your account is approved by the payment partner and your integration is working fine, you will be able to view your Live Nimbbl access_key & access_secret in the Command Center. To learn how to view and download your keys, see the developer settings guide.
You will need to add the Live keys and Disable Test mode as explained above.
Refunds
To process refunds on payments made on your Shopify store, you have two options.
- Use shopify dahboard to process refunds. Navigate to Login to your Shopify Admin Portal > Click on Orders > Select the order that you want to refund > Select Refund option > Enter the amount you need to refund > Click on Refund button.
- Use Nimbbl Command Center to process refunds for payments made. Refer to the refunds documentation for detailed documentation on how to process refunds and explore more about Command Center